What’s basic but decent?

The question I am asked the most is something like “I have $2,000 and I need a sound kit.  What can I get?” The answer is of course, nothing.  But for just under $6,000 you could get a barely adequate package

  1. a shotgun mic
  2. an interior mic
  3. a boom
  4. a mixer
  5. a recorder
  6. a wireless kit

Microphones:

You can’t compromise very much on mics.  No matter how expensive your mixer or recorder is or how well you know how to use it, if your mic sucks, your audio sucks.  Period.  Also, you MUST have two mics, one shotgun for almost everything and one hyper or super cardiod for the spaces that a shotgun will not work.  Basically the rule of thumb is shotguns for exteriors and a small diaphragm condenser with a hyper cardiod polar pattern for interiors.  Really, do not compromise here because you will regret it.  Microphones for audio recording systems are analogous to lenses for cameras.  They will last forever, never lose their values and are the pointy end of the spear.  They have to be good.

What I own and totally recommend:

a. Shotgun: a Sennheiser 416 (about $1,000).  THE Hollywood classic that everything is compared to.  Better yet,  Sennheiser MKH-60 (about $1,500)
b. Small diaphragm condenser:  Schoeps CMC641 with a CUT1 (about $2,500)

Lower end:

a. Shotgun: Rode NTG 3 ($700)
b. Small diaphragm condenser: AT 4053b ($600)

If you are serious about audio, please do not compromise here.  Buy the good stuff.  This is not where you want to save money because it effects everything in the audio chain. Continue reading

MFA

Three years ago, I started grad school at The University of Montana.  On Saturday, May 12th, I received my MFA in digital film making from the school of Media Arts, College of Visual and Performing Arts.   Although production audio is my main love and specialty, my experiences writing, directing, producing and just making movies really help my understanding of the “big picture” of film making.

Panasonic AF-100

I have been doing so many shoots on DSLR’s these days that it has been a couple of years since I recorded directly to camera. I just got back from working on a doc in Helena, MT for the Veteran’s Administration. The story followed an Army Guard member who had a hip replacement through a new VA program that allowed her to receive physical therapy through local private practitioners rather than having to drive hundreds of miles to a VA hospital. She was a fire fighter and did physical work, so the program gave her her life back. But I digress..

We shot on a Panasonic AF-100 and I got to use my remote audio breakaway cable for the first time. The AF-100 has a few quirks that could have caused some problems for sound. First, the level meter in the view finder has two markers, neither labeled, one at 0 dBfs and another one that looks like it should be -20 dBfs but upon reading the manual, I learned it was -12 dBfs.

By default, the AF-100 records to an AC3 compressed audio format. That needs to be changed to LPCM (Linear PCM, uncompressed) and the Automatic Gain Control, called ALC in the menus needs to be turned off. The input switches are self explanatory.

The headphone amplifier is pretty weak and it was very difficult to get a signal back on my breakaway cable with enough gain. I cranked my return A level as high as possible on my Sound Devices 442 and it was still pretty hard to hear.

I still recorded to second system just in case they needed iso tracks later, as I both boomed and ran a lav on the interviews.  All in all, it was a fun little shoot, great people and they had the camera video and audio outputting to a device called a Nanoflash that was interesting.  It actually upgrades the video and audio quality as it records everything uncompressed.

Audio in the Blood

Recently I had the good fortune to be one-half of the sound department on the feature film, Winter in the Blood, written and directed by Alex and Andrew Smith of  The Slaughter Rule fame.   This adaptation of the James Welch novel of the same name was shot on location in Montana.

I haven’t blogged much about the experience or what I learned because I have been waiting for the release of the movie, but I kept a daily journal that I will revisit soon. This was my first feature film and I made some rookie mistakes, got my ass kicked physically and mentally and came out a far  better sound guy and in much better shape.  I learned a lot about making features and about being part of an incredible family, a film making crew.  I know that I can now walk on any film set and be confident that I know what to do and how to act.

Tomorrow I am on a panel at the Big Sky Documentary Film Festival in Missoula to discuss my experience on the film as part of a doc on the “making of”  Winter in the Blood called Visionary Insight.  Just before that we are scheduled to do some ADR with one of the actors in my home studio.  Winter in the Blood has opened some doors for me, no doubt.

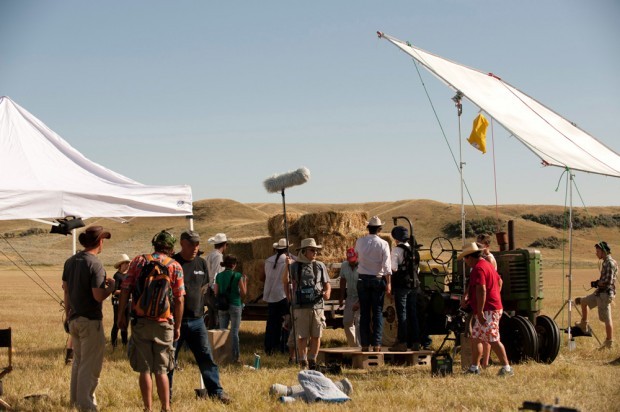
Guess who I am in the following picture from the set.  Hint:  follow the boom.

On the set of Winter in the Blood


The Secret of Good Sound

Getting good sound is not a secret.  It’s simply understanding everything about your role and performing your role very well.

The sound recordist’s role:

  1. Placing the microphones.
  2. Operating the recorder.
  3. Making sure the recording quality is good.

That’s it, really.  If you do those three things right you will get good sound.  The problem is doing those things right takes a hell of a lot of knowledge, experience and skills.  The other problem is what works on one shoot doesn’t necessarily work on other shoots.

1. Placing the microphones:

  • In general, you need to place the microphone as close to the talent as possible.  This is very important.
  • Start with the mic in the frame and make your DP yell at you. Move it slowly out of frame so YOU know where the frame ends.
  • When booming, boom from above with the microphone angled downward aimed at the talent’s mouth.
  • Know and follow the dialog.
  • Know the blocking.
  • Line up the mic with some reference point so you can keep it close to the talent through whatever blocking happens in the shot.

2. Operating the recorder:

  • Use balanced cables for your connections
  • Bit rate set to at least 16 bits, 24 bits is better
  • Sample rate at least 44.1, preferably at least 48kHz
  • Set the level as high as possible without clipping.  Peaks should be about -6 dbFS
  • Know your recorder

If your recorder doesn’t have these capabilities, you need a new one.

3. Making sure the recording quality is good:

  • LISTEN.  To everything.  Most important.
  • Good headphones are a must. (closed ear pads)
  • Play some of the clips back, verify levels.
  • Communicate issues immediately.

Simple, right?  Not exactly, but that’s the secret in a nutshell.  Use the right mic, get the mic close, set the levels correctly, follow the dialog and communicate issues.

Upcoming posts are going to go into specific details about:

  • What microphone to use and why.
  • Recorders, mixers, accessories.
  • Boom Technique.
  • Headphone reviews.
  • Acoustic properties of rooms and treatment.
  • Audio theory 101.

Other topics:

  • Synching second system audio.
  • In-camera audio recording.
  • Audio bags and accessories.
  • Editing audio.
  • Audio Software.

And, of course, anything else you want to see discussed on Production Audio Pro.